Creating Parametric Gear Models with Streamlit and CadQuery
Interactive CAD Design Made Easy with Python
The intersection of parametric CAD modeling and simplified web application development has opened new possibilities for engineers and designers in the field of design automation. Nowadays, with a basic knowledge of Python engineers can create dynamic applications that generate 3D models on the fly in web browsers. This has become possible by combining two open-source libraries: Streamlit for interactive web applications generation based on Python scripts, and CadQuery - for programmatic CAD modeling.
This article explores how to build an interactive web application that allows users to design and visualize custom gears by adjusting parameters through a user-friendly interface.
Why Streamlit + CadQuery?
Streamlit is a Python framework that transforms scripts into shareable web applications, making it perfect for interactive tools. On the other hand, CadQuery is an open-source library that allows you to create precise parametric CAD models programmatically. It is based on Open CASCADE - an industry-graded open-source full-scale 3D geometry library. Together, CadQuery and Streamlit bridge the gap between programmable CAD design and interactive web interface, allowing to reuse the formalized logic to generate new instances of parametric 3D model.
Main Pros:
- Transparency of design intention: the logic of constructing 3D model is kept in code, that can be adjusted according to new needs
- Interactive Controls: Interactively adjustable gear parameters, such as module, tooth count, and height in real-time.
- Parametric Modeling: Easily customizable dimensions without altering the core code.
- 3D Visualization: preview your 3D model directly in the browser (with the help of PyVista).
Project Overview
We'll create a simple yet powerful application where users can generate an involute gear by adjusting key parameters such as the module, tooth count, height and center hole diameter. The gear model will be dynamically generated and visualized using Streamlit.
Core Components:
- Gear Generation Logic: Knowledge-based model written in Python with the help of CadQuery to create an accurate 3D model of involute gear.
- Graphical User Interface: Streamlit web app with user controls in the form of sliders to adjust gear parameters.
- 3D Visualization: 3D model is rendered in real time using PyVista integration.
Step 1: Building the Gear Model
The heart of this project lies in generating the knowledge-based gear model. Here's the class responsible for the core logic:
from cadquery import Workplane, Edge, Wire, Vector
from math import radians, tan, cos, sin
class GearGenerator:
def __init__(self, module, teeth, pressure_angle=20, height=10):
self.module = module
self.teeth = teeth
self.alpha = radians(pressure_angle)
self.height = height
def create_tooth_profile(self):
# Gear geometry calculations
pass # Complex math omitted for clarity
def build_gear(self):
tooth_profile = self.create_tooth_profile()
gear_profile = (
Workplane()
.polarArray(0, 0, 360, self.teeth)
.each(lambda loc: tooth_profile.located(loc))
.consolidateWires()
)
return gear_profile.val()
How It Works:
- The central class GearGeometry and several methods are responsible for constructing individual gear teeth, assembling them into a full gear profile, and integrating the result into a 3D model ready for visualization and export.
Class: GearGeometry handles geometric calculations and a gear profile creation
self.__init__()
Initializes the gear geometry with key parameters:
- module: Determines tooth size (distance between teeth).
- teeth: The number of teeth on the gear.
- pressure_angle: Defaults to 20 degrees; affects tooth shape.
self.involute_curve()
Returns a curve function that calculates points on the involute curve (which is basically the
shape of a gear tooth), based on the base circle radius.
self.create_tooth_profile()
Creates a single gear tooth profile using:
- Angles for involute curves and edges calculated using trigonometric relationships.
- Edges for the tooth shape, including left and right involute curves, top and bottom arcs, and dedendum lines.
- Tooth profile assembled using Wire.assembleEdges() for forming a complete 2D outline of a tooth.
self.create_gear_profile()
Constructs the full gear profile:
- Tooth profile is replicated using a polar array.
- Each tooth is located using transformations, and wires are consolidated into a continuous gear profile.
Gear Geometry: We use mathematical calculations based on the involute profile, ensuring the gear teeth will mesh smoothly. The basic logic for creation is taken from CadQuery contrib repo.
Parametric Design: By adjusting parameters like module and teeth, users can generate various gear sizes and shapes without modifying the code structure.
Step 2: Setting Up Streamlit Controls
Streamlit provides an easy way to create sliders and input fields for user interaction. This allows users to adjust the gear parameters dynamically:
import streamlit as st
module = st.slider('Module (m)', 1, 5, 2)
teeth = st.slider('Number of Teeth', 17, 30, 20)
height = st.slider('Gear Height (mm)', 10, 30, 20)
center_hole_dia = st.slider('Center Hole Diameter (mm)', 2, 12, 5)
Why Use Sliders?
Sliders offer an intuitive way to explore different parameter values, making the design process more interactive and engaging.
Step 3: Generating and Exporting the STL File
Once the parameters are set, the gear model needs to be generated and exported as an STL file. Here's how we do it:
import tempfile
from cadquery import exporters
@st.cache_data
def generate_stl(module, teeth, height, center_hole):
gear = GearGenerator(module, teeth, height).build_gear()
with tempfile.NamedTemporaryFile(delete=False, suffix=".stl") as tmpfile:
exporters.export(gear, tmpfile.name)
return tmpfile.name # Return the path to the STL file
Caching for Performance:
Streamlit's @st.cache_data decorator ensures that the STL file is generated only once per unique set of parameters, significantly improving performance for repeated operations.
Step 4: Visualizing the Gear with PyVista
To provide real-time feedback, we'll visualize the generated gear model using PyVista:
import pyvista as pv
from stpyvista import stpyvista as stv
stl_file = generate_stl(module, teeth, height, center_hole)
mesh = pv.read(stl_file)
plotter = pv.Plotter()
plotter.add_mesh(mesh)
plotter.background_color = 'black'
stv(plotter)
Why PyVista?
PyVista is a powerful library for 3D visualization, which makes it easy to render and interact with complex geometries. The stpyvista package integrates PyVista directly with Streamlit, enabling seamless real-time rendering in the browser. With PyVista you do not need to bother by integrating custom Three.js code in your Streamlit application, making it possible to write the web app completely in Python.
Running the Application
Save your script as gear_model.py and run it with Streamlit:
streamlit run gear_model.py
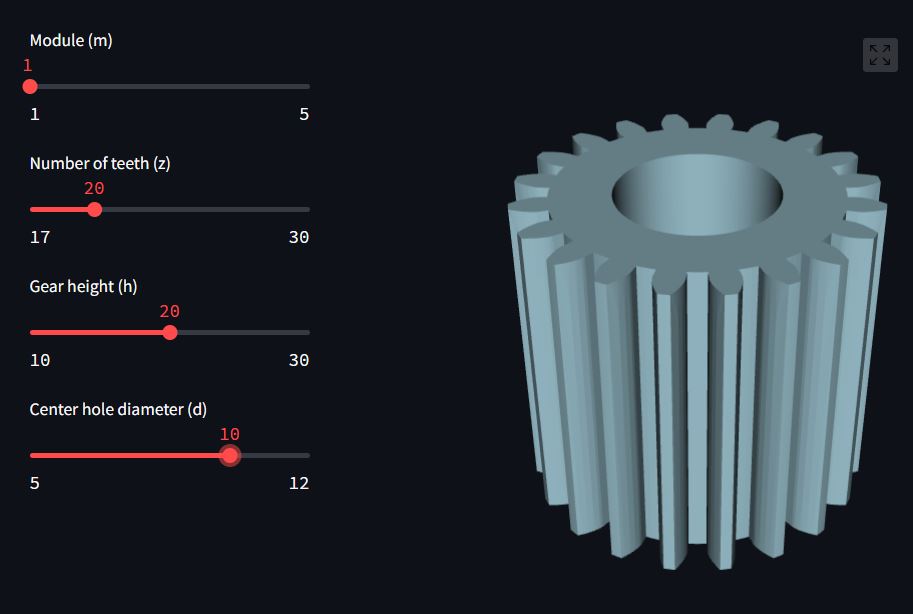
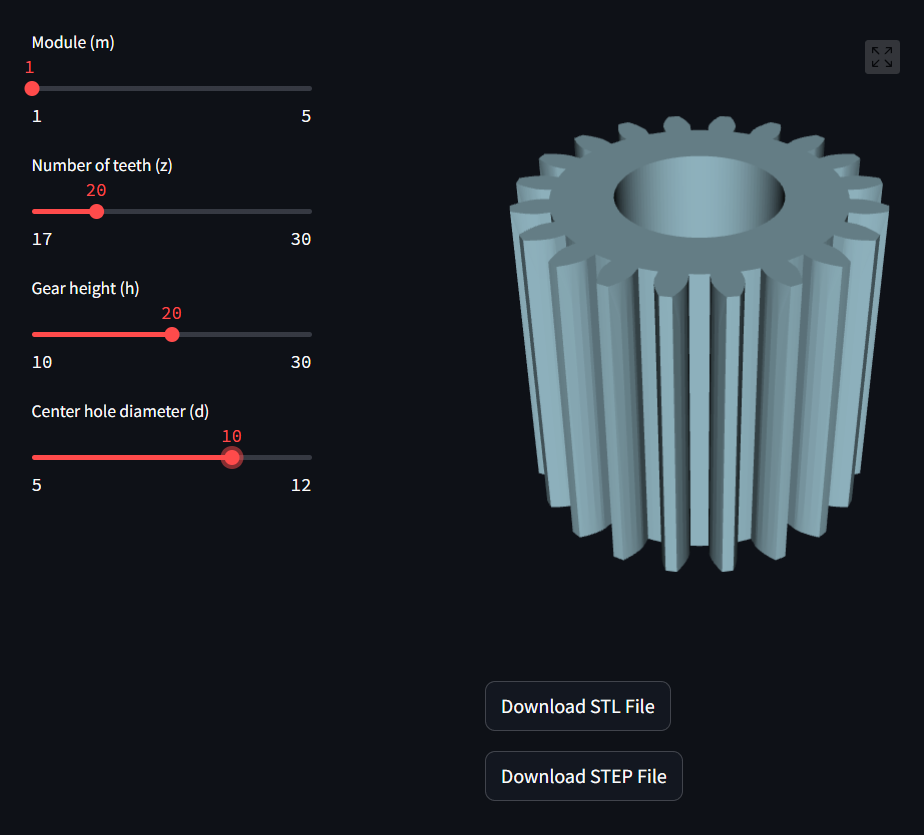
Open your browser, and you’ll see an interactive interface where you can tweak the gear parameters and visualize the model instantly! You can also download the result gear model in .stl or .step format. Here is how it looks:
Conclusion
This project demonstrates the power of combining Streamlit and CadQuery to create an interactive, knowledge-based web application that allows to regenerate model on the fly and reuse the logic formalized in code. By leveraging SOLID principles, we ensured the code is modular, maintainable, and ready for future extensions. This setup isn't just limited to gears - you can adapt it to generate other parametric models, making it a universal combination of tools for creating reusable engineering web applications regardless of the design complexity.
Next Steps:
- Extend Functionality: Add more gear types (e.g., helical, bevel).
- Enhance UI: Use more Streamlit widgets for richer interactions.
- Gear Box Generator: Use more advanced design logic to generate gearboxes.
- Integrations: Connect with 3D printers for instant prototyping!
Happy coding, and may your gears always mesh smoothly!
Repo with a source code is here: https://github.com/scorpaena/streamlit-gear-app